Tuesday, January 26, 2010

Expandable post summaries on blogger

You want know how to create expandable post summaries on main page of your blogger blog? You want to display only few lines of text from the beginning of each post, and one read only link bellow each summary which is linking to the rest of article? With help of jump break blogspot feature it is very easy to accomplish it. "Jump break" feature is also called "After the Jump" feature lets you create expandable post summaries in your blog posts, so longer posts appear as an intro with a link to Read More.


"After the Jump" feature can be very handful when your blog contains long posts and you want to only show a selected snippet of each post on your homepage with Read More option to lead visitor to the complete post. In this guide you will learn how to implement Read more option to your blogger blog. Check articles with useful tips for blogger!


Insert read more in post


To insert read more link in your blog you need to put this code in Edit HTML on the place where you want to Read More link appear:


<!-- more -->

For sample of inserting <!-- more --> take a look for sample on this picture:

Inerting of Read more link for expanded summary in your post


When you publish your post, on your home page (caution: read more is visible only on main page of your blog, not on individual post page) only portion of text before <!-- more --> will be displayed with Read more link. Look for sample on this picture:

Blogger home page with Read more option


Change Read more text


Let's say you don't like "Read more" text for your link and want to change it to "Continue reading...". You can change post page link text directly from blog post widget. Follow those steps:

  • click Layout --> Page Elements

  • in "Blog Posts" click on Edit

    Blogger edit posts

  • Change Post page link text, for example to "Continue reading..."

    Post page link text in Configure blog posts

  • click Save in Configure blog posts widget and you will have new Read more text

For bloggers who use customized templates


If you are using customized template, Read more link will not be displayed. In this case you will have to make some changes in your blogger template. Here are instructions:


  • Go to Layout

  • Click on Layout --> Edit HTML

    Edit blogger template

  • it is recommended (wise) to backup template on local hard disk before doing any change in edit template box

  • click the Expand Widget Templates checkbox and find <data:post.body/>

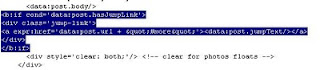
  • after <data:post.body/> paste this code snippet:

    <b:if cond='data:post.hasJumpLink'>
    <div class='jump-link'>
    <a expr:href='data:post.url + &quot;#more&quot;'><data:post.jumpText/></a>
    </div>
    </b:if>


  • it should look something like this:

    Update code for expandable summaries in blogger customized templates

  • save template and from now you should see Read more link on your main page

Tuesday, January 19, 2010

Scrolling text HTML code

Learn how to add scrolling text on your site or web page. Read this guide and you can make text to move horizontal or vertical. You just need to copy scrolling text HTML code from this page, adjust copied code and paste it to your HTML page.


To add scrolling text or images on web page use MARQUEE HTML tag. MARQUEE tag can work well for announcements. So, with MARQUEE tag you can easily get animated text effect on your page.


Take a look at scrolling text sample made with MARQUEE HTML code:


  MARQUEE scrolling text

  Link to my blog


In this tutorial you will find:

  • Simple scrolling text HTML code sample

  • How to change direction of animated text

  • Change style of scrolled text

  • How to stop scrolling on mouse over Marquee control

  • guide for implementing Marquee on blogspot (blogger)


Simple scrolling text HTML code sample


Code for scrolling text from left to right:


<marquee direction="right" behavior="scroll" scrollamount="1" >Simple marquee sample</marquee>


Result:

Simple marquee sample


Marquee direction attribute

Animated text can move left to right, right to left, up to down or down to up. Direction :

  • left - text is moving right to left

  • right - text is moving left to right

  • up - text is scrolled upward

  • down - text is scrolled form up to down


Scrollamount attribute - how fast text will be scrolled, higher number faster is scrolled

Change style of MARQUEE tag


You will probably want to limit area of Marquee effect on your site. You can do it with style attribute inside your MARQUEE HTML tag. You need to use height and width property. If you want visible border of your rectangle add border property to your style attribute.


Sample HTML code for MARQUEE limited to rectangle 100 x 200 with thin black border:


<marquee style="border: thin solid rgb(0, 0, 0); height: 100px; width: 200px;" direction="up">&nbsp;<a href="http://interestingwebs.blogspot.com/">Link to my blog</a></marquee>


Result:
 Link to my blog

You can use Marquee code HTML generator by clicking this link.

Stop scrolling when a mouse is over Marquee area


How to stop scrolling when a mouse hover scrolling text? To accomplish this task javascript event onmouseover will be used. Also javascript event onmouseout will be used to continue scrolling when mouse pointer lost focus of Marquee. To see how this work check first scrolling text sample at beginning of this article.


Sample code for stop scrolling text when mouse is over text and start scrolling text when focus is lost:


<marquee direction="right" behavior="scroll" onmouseover="this.stop();" onmouseout="this.start();">Simple marquee sample</marquee>


Tutorial for implementing Marquee on blogger (blogspot)


Add HTML code for Marquee element to blogger sidebar (for help visit this article : How to add HTML or JavaScript gadget to blogger


Here is code for Marquee sample from beginning of the article:


<marquee style="border: thin solid rgb(0, 0, 0); height: 120px; width: 200px; background-color: rgb(255, 255, 255); font-family: Arial; font-size: 10pt; color: rgb(0, 0, 0);" direction="up" behavior="scroll" scrollamount="1" onmouseover="this.stop();" onmouseout="this.start();">&nbsp; MARQUEE scrolling text<br /><br />&nbsp; <a href="http://interestingwebs.blogspot.com/">Link to my blog</a></marquee>

Marquee HTML tag can be used for announcements, but be carefully, one can be OK, but if there are too many visitor can get headache.

Bad news is that Marquee tag is obsolete in HTML5. To find out how to achieve HTML5 scrolling text effect visit article: HTML5 scrolling text.

Tuesday, January 12, 2010

Blog decisions in new year

In the end of 2009 I stopped publishing new posts because I get tired. After take about one month vacation it is time for new posts. For new year I set two goals. First goal is to regularly publish one new post every week on tuesday. Second goal is to publish guest posts on blogs more famous then my blog and to track how this action impact on my web traffic.


Publish post once a week


This is a goal that I believe it is possible for me to achieve. My intention is to publish once a week every tuesday and keep that rhythm. If I miss to publish new article on one tuesday, then I will continue to prepare new articles and continue on next week. My thesis is that it is better to publish four articles in four weeks than four articles in firs week and than three weeks nothing for visitors and search engines. I believe it is good to keep same rhythm all the time, visitors will be used to check for new articles every tuesday.


When we are talking about blog publishing frequency there are some advices like to not publish on weekend and Public Holiday because of less visits on those days. One advice also say to not post anything for a while after very important post so your important post remains at the top of your blog.


Search engine likes blogs who publishes often and frequently. If your posts are published more frequently means more frequency of your content in Search Engines. You must be careful to not set for goal to publish too many posts per week (or day), you can burnout. My advice is to set reasonable goal and to keep regularity and rhythm. For example some magazines are published every week and you know that you can buy a new issue of magazine on specific day in week.


Publish guest posts


Publishing guest posts on blogs with high rate of visits can help your blog to become more known. First problem is to find someone who have web traffic and who is ready to publish your article with link to your blog. Currently I do not have experience with guest posting and its influence on guest poster blog web traffic but I think it have potential.

Monday, January 4, 2010

Do not count my visits in GA - cookies

Here is a guide how to exclude your visits from GA (Google Analytics) statistics with help of cookies. If you have static IP address you can learn how to exclude your IP address in google analytics by clicking this link. In linked article you can also find do you have static or dynamic IP address.


This tutorial for excluding your visits in GA is simpler than most other tutorials you can find on Internet about same topic. Main goal of this article is to help blogger users to count off their visits from GA records.


Exclude your own traffic from GA records with cookies


  • First go to web page you track with Google Analytics

  • copy code below and paste this code in address bar of you browser (don't forget to click enter)

    javascript:pageTracker._setVar('DoNotCount');alert('Cookie has been created')


  • With this line of code in browser address bar you will create cookie for visited site with content "DoNotCount" or other if you change colored text. If you want to check created cookie visit my article Check cookies on my computer


  • now you need to create filter


  • In your Google Analytics click Edit

    Edit in Google Analytics

  • Click Add filter in the Filters Applied to Profile box

    Add filter in Google Analytics


  • enter filter name, for filter type choose Custom filter, choose Exclude. For filter field choose User defined. For field pattern enter same text you set in javascript we paste in address bar (colored text, in our example: DoNotCount)

    Custom exclude filter for cookie in Google Analytics

  • now you need to wait few days and GA (Google analytics) will no more count your visits. This guide was tested on my blog and it works.